I switched between three games in one evening last week and realized I’d been manually flipping my Razer Cobra’s DPI between Overwatch, Marvel Rivals, and just browsing YouTube for about a year. Like, every single time. Tap the DPI button, count the LED stages, hope I landed on the right one. Embarrassing, because Synapse 4 has had per-game auto-switching this whole time and I just never wired it up properly.
So this is the version I wish someone had walked me through. Specifically how to set up Razer Synapse 4 profiles so your DPI, polling rate, lighting, and macros all auto-swap the second a specific game launches. I’m running this on a Razer Cobra Wired with a BlackWidow V4 Pro keyboard and Kraken V4 X headset. The walkthrough applies to any modern Razer device that’s supported by Synapse 4.
If you’re brand new to Synapse 4 and want the full feature tour, I covered that in this overview guide. This one is the focused profiles + linked games workflow that the overview only touches lightly.
Why Synapse 4 changed how this works
Quick context. Razer split Synapse into two apps in 2025. Synapse 4 handles the device-side stuff (DPI, polling, macros, keybinds, performance, calibration). The standalone Razer Chroma App handles all the lighting effects and Chroma Studio. Most basic per-device lighting is still inside Synapse 4 under each device’s Lighting tab, but the cross-device “Chroma sync” stuff lives in the Chroma App now.
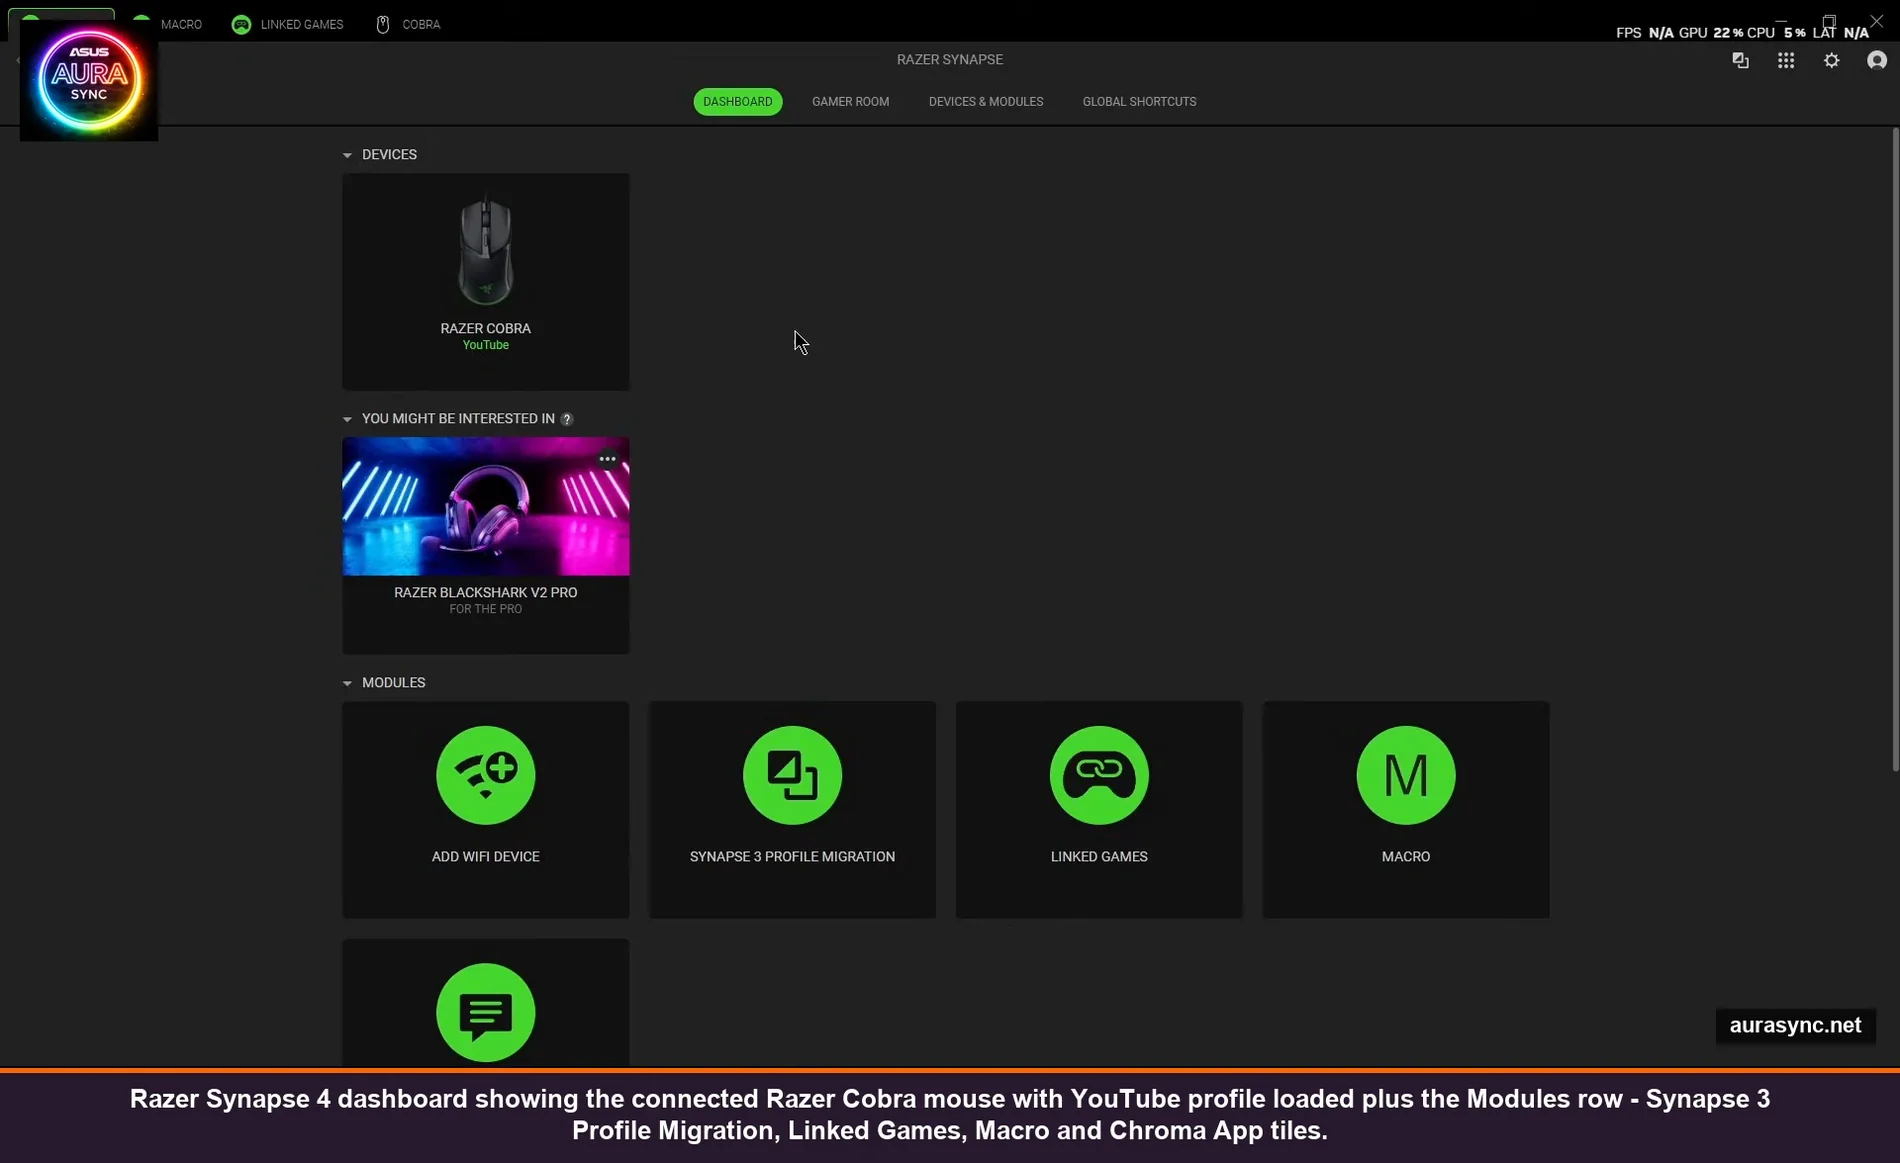
That split tripped me up at first because half the old Synapse 3 tutorials online still show the unified app. The current dashboard has a clean tab bar at the top: Synapse, Macro, Linked Games, plus a tab for each connected device (mine shows COBRA). That’s your whole workflow.
If you migrated from Synapse 3 there’s a “Synapse 3 Profile Migration” tile right on the dashboard. Mostly works but I lost my Hypershift mappings on one device, so check everything after migration. Worth the 10 minutes of redoing it correctly.
Step 1: Install Synapse 4 cleanly
Plug in your Razer hardware first, then run the installer. Synapse pulls device-specific modules based on what it detects, and if your devices aren’t connected at install time you end up doing a second module-install pass later that sometimes silently fails. Plug in mouse, keyboard, headset, whatever, then go to razer.com/synapse-4 and grab the installer. Run as admin.
You’ll need a Razer ID. It takes 30 seconds at the login screen. Not optional, the cloud sync for profiles and macros uses it. If you have multiple PCs (desktop and laptop), the same Razer ID makes your profiles follow you, which is genuinely useful.
⚠️ Heads up: If you’re upgrading from Synapse 3, uninstall Synapse 3 first via the Razer Central tool (or its own installer’s uninstall option). Don’t try to run both. They fight over device control and you’ll get random “device disconnected” notifications every few minutes.
After install, open Synapse 4, sign in, and let it pull firmware updates. Each device that needs a firmware update shows a little yellow dot next to its tab. Click into the device, scroll down, and you’ll see the update prompt. Run them now, before you start customizing anything, because firmware updates wipe profiles on some devices.
Step 2: Rename the Default profile (or actually use it)
By default each device has one profile called “Default.” If you only ever play one game (or none), Default is fine and you can stop reading here. For everyone else: rename it to something meaningful first. Click the three dots next to the profile name → Rename.
I have my Cobra set up like this:
- YouTube – 1600 DPI, 500Hz polling, low brightness static green. This is the default for browsing/work.
- Marvel Rivals – 4000 DPI, 1000Hz polling, breathing red.
- Overwatch 2 – 3200 DPI, 1000Hz polling, static white.
- Productivity – 2400 DPI, 500Hz, RGB off entirely (battery save when wireless, less distraction when working).
The trick is to keep these profiles small and focused. Don’t try to make one mega-profile that handles everything. Per-game profiles are the entire point.
Step 3: Link each profile to a game (the part that auto-switches)
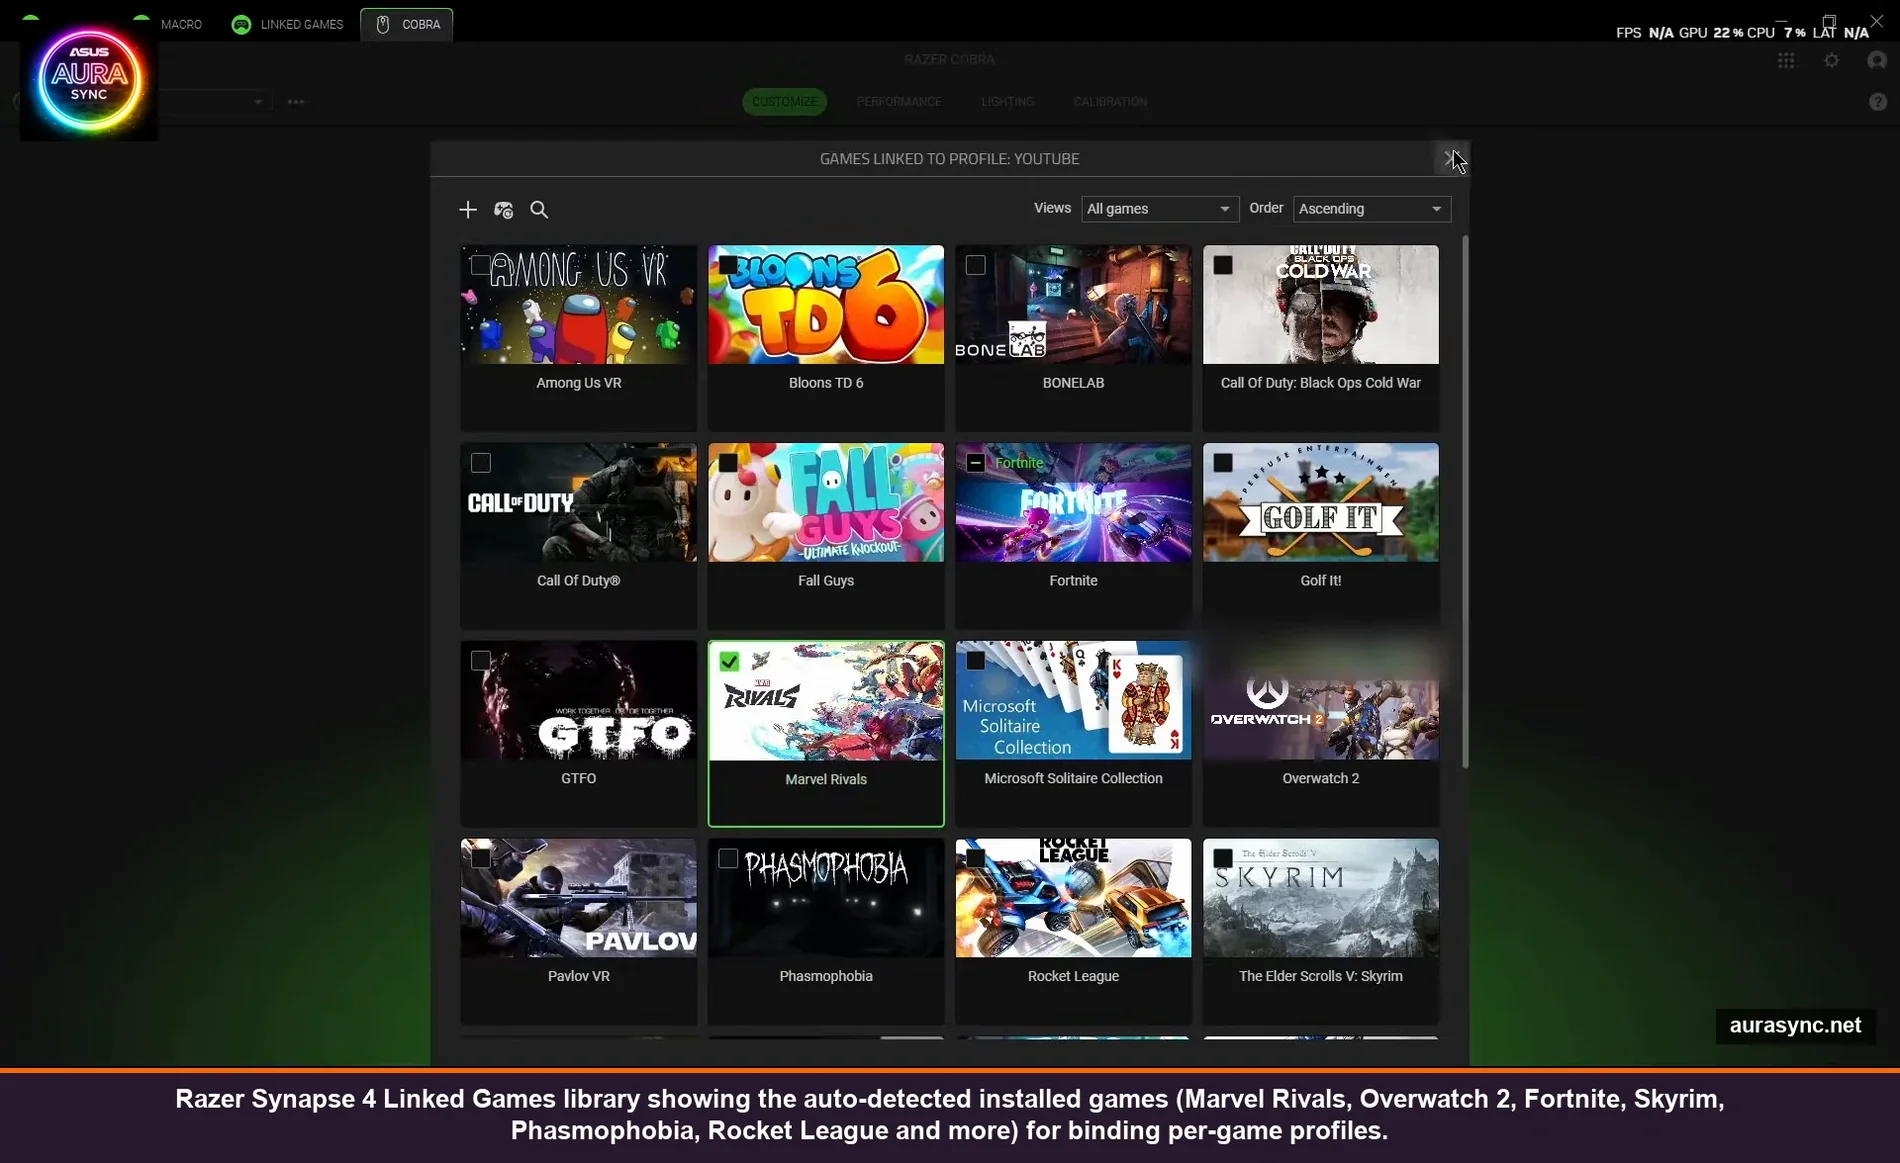
This is the magic and it’s also the bit nobody seems to talk about. Open the Linked Games tab at the top. Synapse 4 scans your installed games (Steam, Epic, Battle.net, GOG) and shows them all as cover art tiles. You’ll see Marvel Rivals, OverWatch 2, GTFO, Phasmophobia, Rocket League, Skyrim, Among Us VR, all of it.
Click the game you want to bind a profile to. A panel opens showing every device profile assigned to that game (mouse, keyboard, headset, etc.). You can also assign a Chroma Studio effect that fires when the game launches, if you set those up in the Chroma App.
The way the binding works: when you launch the linked game, Synapse 4 detects the executable name in the foreground and switches every assigned device to its bound profile within about 1-2 seconds. When you alt-tab to your browser, it switches back. When you close the game, it reverts to whatever the system default profile is.
If your game isn’t auto-detected (some launchers obscure the .exe), there’s an “Add a game/program” tile at the bottom right of the library. Drop the .exe in or browse to it manually. I had to do this for one indie game that ran from a custom launcher.
💡 Pro tip: You can link a profile to a non-game app too. I have one linked to chrome.exe with low DPI and RGB off, so when I’m browsing, the mouse calms down automatically. Same for obs64.exe – my streaming profile auto-loads when OBS opens.
One quirk: if two profiles are linked to programs and both are running (game + Discord overlay, for example), Synapse uses whichever one is actively focused. So Discord-overlay-active means Discord profile wins, click back to the game and the game profile takes over. Usually this is what you want, occasionally it ping-pongs annoyingly. If it happens, unlink the secondary app.
Step 4: Per-profile DPI and polling rate
Now for each profile you actually need to set the device behavior. Click your device tab (mine is COBRA), make sure the right profile is selected from the dropdown at the top left, then go to the Performance tab.
The Cobra Wired caps at 8500 DPI but most setups want 1600-4000. The honest take after testing all of them: anything over 3200 on a 1080p monitor is just sensitivity overkill, you’ll be over-aiming. Go with what your wrist and grip actually need. I ran 4000 for two weeks because “more is better” then dropped back to 3200 and immediately played better.
For polling rate, just pick 1000Hz unless you have a specific reason. Lower polling rates (125, 500) save tiny amounts of CPU which matters precisely never on a modern PC. Some Razer mice (Viper V3 Pro, DeathAdder V3 Pro, certain HyperPolling models) go to 4000 or 8000Hz, which is genuinely useful for high-refresh competitive play but adds non-trivial CPU load at idle. I’d leave it at 1000Hz for general use and bump to 4000 only if you have a 240Hz+ monitor and play CS or Valorant seriously.
You can also set DPI Stages here, which is the multi-DPI cycle through your DPI button. I set my Marvel Rivals profile to have stages of 3200, 4000, 5000 – lets me tap up and down for sniper vs close-range without leaving the profile. You can have up to 5 stages per profile.
Step 5: Per-profile lighting (the bit Razer split out)

The Lighting tab inside each device is where most people get lost because of the Synapse 4 / Chroma App split. Here’s the actual breakdown:
Inside Synapse 4 → device → Lighting tab: per-device “Quick Effects.” This is Static, Spectrum Cycling (rainbow), Breathing, Reactive (lights up where you click), Audio Meter, and a few others. These are saved per profile, so each profile can have its own effect.
Inside the Razer Chroma App → Studio: cross-device synced effects, custom layered stuff, Chroma Studio creations. This is where the fancy “all my devices ripple together when I get a kill” stuff lives.
For most people, the per-device Quick Effects inside Synapse are enough. The Brightness slider goes 0-100 and there’s a “Switch off lighting” panel with two checkboxes: “When display is turned off” and “When idle for X minutes” (max 15). I always enable both for any profile that’s not actively in-game, otherwise the RGB stays on through movies and the AMB bouncing around at 2am is annoying.
The “Only one Chroma-enabled device is connected” warning that pops up under Effects when you have just one device is normal. It just means cross-device sync isn’t possible, which is fine if you only have one Razer device.
Step 6: Macros (and why I barely use them)
Honest moment: I almost never use macros. They’re powerful but the time investment to set them up correctly only pays off if you have a really repetitive in-game action that benefits. Open the Macro tab at the top. Click “New Macro,” name it.
The action types are: Delay, Keyboard Function, Mouse Function, Macro (nest a macro inside another macro), Launch (open a program), Run Command (terminal command, careful), Text Function (type out a string), and Loop (repeat the macro N times or while held).
The most actually-useful macro I’ve built is a double-click on Mouse Button 5 for games where rapid clicking matters but isn’t tied to spam-skill (Diablo-style ARPGs, certain MMO rotations). Setup: New Macro → name “Double Click” → Add → Mouse Function → Double Click → Save. Then go to Key Binds and assign the macro to a button.
📝 Note: Some games actively block macro inputs. Valorant’s Vanguard, Riot’s anti-cheat, will detect and ban for macros that fire multiple inputs from a single click. Overwatch 2 is more lenient. Read your game’s specific anti-cheat policy before binding macros to anything that gives a competitive advantage. I learned this the hard way with a “single key triggers a 3-shot burst” macro on Apex that earned me a 2-week ban.
Step 7: Key Binds and Hypershift

Key Binds is where you actually map a macro (or any function) to a physical button. Click the Key Binds tab inside the Macro section, click your device, then click the button you want to remap. Pick the function or macro from the dropdown.
This is also where Hypershift lives, and Hypershift is the most underrated Razer feature nobody uses. Hypershift gives every button on your device a second function that activates while you’re holding a designated Hypershift key. So your scroll click becomes “Macro 1” normally, but “Open OBS recording” when Hypershift is held. Effectively doubles your bindable inputs without adding extra keys.
To set it up: Key Binds → switch from Standard to Hypershift at the bottom of the device diagram → assign whatever you want to each button → designate one button (usually a side button or Caps Lock on keyboards) as the Hypershift trigger.
I use Hypershift on my keyboard. Standard layer is normal QWERTY, Hypershift layer (held with Right Alt) turns all the F-keys into Discord controls (mute, deafen, push to talk for different servers). You don’t realize how much you needed it until you have it.
Macros and keybinds are saved per-profile, so your Marvel Rivals profile can have one macro on scroll click, and Overwatch can have a different one. Or none.
Step 8: Save and verify the auto-switching actually works
Synapse 4 auto-saves profile changes as you make them. There’s no “Save” button on the device pages. The Save button on the Macro Builder is just for the macro definition itself.
To verify auto-switching: launch a linked game. Look at the profile dropdown in your device tab. It should switch to the bound profile within 1-2 seconds of the game window taking foreground focus. Quit the game, the dropdown reverts.
If it doesn’t switch, three usual culprits:
- The .exe Synapse detected isn’t the actual game launcher. Some games launch a stub .exe that then spawns the real one. Right-click the running game in Task Manager → Open File Location → bind that exact .exe instead.
- Synapse service isn’t running. Check Task Manager for “Razer Synapse Service” – if it’s not there, restart Synapse from the system tray.
- Profile is locked to a different device. Each device has its own profile list. The Cobra’s “Marvel Rivals” profile is separate from the BlackWidow’s “Marvel Rivals” profile. Both need to be linked.
Cross-device Chroma sync (when you want all devices in unison)
If you want your mouse, keyboard, and headset to all flash red on a kill, that’s the Razer Chroma App’s job, not Synapse’s. Install it from the same razer.com/synapse-4 page (it’s a separate download but they’re packaged together).
Inside the Chroma App, the “Apps” section integrates with games that natively support Chroma. There’s a list of supported titles – Apex, COD, Fortnite, Path of Exile, plenty of others. Toggle them on and the in-game events drive your lighting automatically. No setup beyond toggling the integration.
For custom synchronized effects, Chroma Studio is the layered effect editor inside the Chroma App. You build effects in stacked layers (think Photoshop), assign them to lighting zones across all your devices, and the result is one synchronized effect that fires across the whole set. Also set as a Linked Game effect so it auto-loads with the right title.
That’s a deeper rabbit hole. If you want the Chroma Studio walkthrough specifically, that’s worth its own article and I’ll link one out when I get to it.
Common Synapse 4 problems and the actual fix for each
Profile won’t switch when the game launches
99% of the time it’s the .exe binding pointing at the wrong file. Use Task Manager → Details → find the running game → right click → Open File Location to get the actual .exe. Re-add the game in Linked Games using that direct .exe path.
Synapse forgot all my profiles after a Windows update
Cloud sync should pull them back. Sign out of Razer ID, sign back in, wait 30 seconds. If it didn’t sync (it happens), restore from the local backup at %LOCALAPPDATA%\Razer\Synapse4\Cache. There are .json files in there with your profile state.
Synapse uses 8%+ CPU at idle
Almost always a stuck firmware update or the Razer Central updater hammering. Open Task Manager, sort by CPU, see which Razer process is the offender. Kill it (it’ll restart). If “Razer Central” is the culprit, set its update check interval longer in Razer Central settings.
RGB resets to rainbow after every reboot
Different problem entirely – it’s a Windows Dynamic Lighting fight. I covered the full fix in this troubleshooting guide. Short version: priority app order in Dynamic Lighting settings, then make sure Synapse 4 is the priority controller.
Macros work in some games and not others
Anti-cheat blocking, almost always. Vanguard (Valorant), Easy Anti-Cheat (Apex, Fortnite), and BattlEye (PUBG) all flag and block multi-input macros. Single-key remaps usually pass, automated sequences don’t. There’s no Synapse-side fix – it’s the game blocking the input layer.
Linked Games doesn’t see my Steam library
Synapse looks at the standard Steam library path and the manifest files. If your Steam install is on a non-default drive, Synapse 4 reads it via the Steam manifest, not by scanning the drive. Open Steam → Settings → Storage → make sure all your library folders are listed. Then in Synapse, refresh Linked Games (gear icon → Refresh).
Synapse 4 vs the alternatives
If you’ve made it this far and you’re still hitting walls, the honest truth is that vendor RGB and macro apps have a ceiling. Synapse 4 is great for Razer-only setups. The moment you have a Logitech mouse, a Corsair keyboard, and a Razer headset in the same build, no single vendor app handles it all. That’s where SignalRGB, OpenRGB, and InputDirector come in.
I’ve written separate breakdowns of OpenRGB vs SignalRGB and SignalRGB free vs pro if you want to compare. For a Razer-pure setup though, stick with Synapse 4 and the Chroma App. The per-game profile auto-switching alone is worth the install, and once you set it up you basically never touch the dashboard again.
FAQ
Do I need both Synapse 4 and the Chroma App installed?
For basic per-device lighting, just Synapse 4 is enough. For cross-device synced effects, in-game Chroma reactions (kills flashing red, low health flashing yellow, etc.), and Chroma Studio, you also need the Chroma App. Both are free, both install from razer.com/synapse-4. They run in parallel without conflict.
Will Synapse 4 work without an internet connection?
Yes for using existing profiles, no for creating a Razer ID or first-time login. Once you’re signed in, you can use Synapse offline indefinitely. Profile cloud sync just queues until you’re online again. The Razer ID requirement is annoying but it’s not a per-launch internet check.
How many profiles can I have per device?
I’ve never hit a limit. I have 11 profiles on my Cobra and Synapse hasn’t complained. The practical limit is more “how many can you remember” than a hard cap.
Can I export profiles to share with friends?
Yes. Three dots next to the profile name → Export. You get a .razerprofile file you can share. They import via the same menu. Macros export separately as .razermacro files.
Does Synapse 4 work on Linux?
No. There’s no official Linux Synapse. The OpenRazer project supports a lot of Razer hardware on Linux (lighting and basic settings) but no profile-and-game-link auto-switching. If you’re on Linux, OpenRazer + Polychromatic is the closest you get.
What happens if I’m signed into Synapse on two PCs at once?
Both work independently and your profiles sync between them via the Razer ID. Edit a profile on PC A and within ~30 seconds it shows up on PC B. The exception is the per-PC overrides like surface calibration (which is mat-and-mouse-pair specific and doesn’t sync).
Is Synapse 4 still in beta?
It exited beta in 2024. As of 2026 it’s the default download from razer.com. Synapse 3 is in maintenance mode (still gets updates for older devices that haven’t been ported to Synapse 4 yet, but no new features).
Wrapping up
Synapse 4 has a reputation for being bloated and a lot of that reputation was earned in the Synapse 3 era when it was a memory hog with broken services. The current Synapse 4 is genuinely lightweight (around 0.5-1% CPU at idle on my 9800X3D), the per-game auto-switching just works, and the Chroma App split actually makes sense once you understand which one does what.
If you do nothing else from this guide, set up Linked Games with at least 2 or 3 profiles. The first time you launch a game and your mouse instantly snaps to the right DPI without you touching anything, you’ll wonder why you ever used a single profile.
And if it’s still not switching profiles for you, the .exe binding is almost always the culprit. Open Task Manager, find the actual running .exe, re-add via that path. Good luck.