iCUE is one of those apps where the actual functionality is great and the experience of getting to that functionality is where it falls apart. I have a Corsair-heavy build (K100 keyboard, M65 RGB Ultra, four QL fans on a Lighting Node Pro, Vengeance RGB Pro SL RAM, H150i Elite AIO) and the first time I installed iCUE 5 I spent forty minutes wondering why my RAM wasn’t lighting up while my keyboard was syncing fine.
The answer turned out to be a single BIOS toggle nobody mentions. More on that below.
This is the iCUE setup walkthrough I wish existed when I switched from a mostly-ASUS build to a Corsair-dominant one. It covers the actual install, the firmware step everyone skips, the Lighting Node Pro fan setup, the lighting layers system (which is genuinely the best of any vendor RGB app), the hardware vs software lighting distinction, fan curves, and the gotchas that send people to forums.
If you came here from a multi-brand setup where iCUE refuses to play nice with your ASUS or Razer gear, that’s a known limitation, not a bug. Corsair RGB uses proprietary protocols and other apps can’t see it. The cross-brand workaround (using SignalRGB to talk to everything) is covered in this guide. This article is for people who are mostly Corsair and want to make iCUE work properly.
Step 1: Install iCUE 5 (and skip the language trap)
Download iCUE 5 from corsair.com/downloads. Run as admin. The installer is straightforward but there’s one thing that catches people: set your language and country to match your Windows locale during install. If you install with English-US but your Windows is set to English-UK, iCUE 5 will misread some Unicode characters in macros and your custom profiles can break in ways that look random.
Reboot after install. Yes, really. iCUE installs three background services (Corsair Service, Corsair iCUE Service, Corsair Update Service) plus a USB filter driver that needs a reboot to fully attach. If you skip the reboot, devices show up as “detected” but half their features don’t work and you’ll spend an hour diagnosing what was just a missing service start.
If you’re upgrading from iCUE 4, the installer can leave behind orphaned profile files. After upgrade, go to Settings → Profiles → Clear Cache. Saves headaches later.
Step 2: Update firmware before you touch lighting
This is the same advice I gave for Armoury Crate (link) and for the same reason: vendor RGB apps assume current firmware. Every device in iCUE has a Settings cog → “Check for Updates” button. Run it on every device individually. The “Check All” button at the top exists but it sometimes misses devices with pending firmware that haven’t been queried yet.
The order I do them in: keyboard first, mouse second, controllers (Lighting Node Pro, Commander Core, iCUE Link Hub) third, AIO last, RAM never (RAM doesn’t need firmware updates through iCUE). For controllers specifically, after the firmware update completes, fully exit iCUE from the system tray, wait 10 seconds, reopen it. The lighting channels won’t repopulate properly without that exit cycle.
⚠️ Heads up: close all other RGB software before any iCUE firmware update. ASUS Armoury Crate, MSI Center, Gigabyte RGB Fusion, Razer Synapse – any of them open during a firmware update can cause the update to silently fail. The device will report success and then the new firmware won’t apply because another service was holding a USB endpoint.
Step 3: The RAM-not-detected fix (BIOS SPD Write)

If your Corsair RGB RAM (Vengeance RGB Pro, Dominator Platinum RGB, anything with addressable LEDs) shows up in iCUE as “detected” but the lighting controls do nothing, this is your fix and it’s purely a BIOS setting.
iCUE communicates with RAM RGB over the SMBus, specifically through the SPD (Serial Presence Detect) channel. Many motherboards now ship with SPD Write Disable: TRUE as a default for security reasons (it stops malware from corrupting the SPD chip on your RAM). When SPD Write is disabled, iCUE can’t send lighting commands to the RAM.
The fix is straightforward but not obvious:
- Reboot into BIOS (usually F2 or Delete on boot)
- Find the setting. On ASUS boards it’s under Advanced → AMD/Intel Tweaker → SPD Write Disable. On Gigabyte it’s under Advanced Memory Settings. On MSI it’s under OC → DigitALL Power → SPD Write Disable. On ASRock under OC Tweaker.
- Set it to FALSE (or “Disabled” depending on phrasing – you want SPD Write to be allowed)
- Save and exit
- Boot into Windows, open iCUE – your RAM should now be controllable
This affects almost everyone with Corsair RGB RAM on a 600-series Intel or 800-series AMD board because security defaults shifted around 2024. If your build is from before then, SPD Write was usually enabled by default and you wouldn’t hit this. New build with new RAM and new mobo? Almost guaranteed to need this toggle.
📝 Note: the security tradeoff is real but minor for normal users. Malware that exploits SPD writes to brick RAM exists in proof-of-concept form but isn’t seen in the wild. If your threat model is “regular gaming PC,” enabling SPD Write is fine. If you’re in security research or running sensitive enterprise hardware, leave it disabled and accept that RAM RGB won’t work.
Step 4: Configure your Lighting Node Pro / Commander Core / iCUE Link hub
This is where new iCUE users get most frustrated and it’s because Corsair has shipped three generations of RGB controllers in the last five years and they all configure differently:
- Lighting Node Pro (the older one, two RGB channels): you have to manually tell iCUE what’s on each channel. Open the device, go to Lighting Setup, pick “Lighting Channel 1,” select the device type from the dropdown (e.g., “ML Pro RGB Series”), and add the count. Repeat for Channel 2 if you have a second daisy chain.
- Commander Core / Commander Core XT (six channels, integrated with H100i/H150i Elite AIOs): mostly auto-detects. Go to Lighting Setup and you should see fan slots labeled Fan #1 through Fan #6. If a fan slot is wrong, click it and pick the right model.
- iCUE Link Hub (newest, smart-cabled): fully auto-detects via the iCUE Link smart cabling. There’s basically no setup other than running the ROM Wizard if iCUE prompts you to.
The classic Lighting Node Pro mistake: only one fan lights up and the rest stay dark. That’s because the fan model is wrong in the lighting setup. Pick the actual model (ML Pro RGB, QL, LL, HD – they all have different LED counts per fan, ranging from 4 to 34) and the rest will light up.
💡 Pro tip: when you’re configuring channels, the test pattern Corsair calls “Watercolor Spectrum” lights every LED in a different color so you can see which physical fan is on which iCUE slot. Run that, then physically look at your case to map fan #1 / #2 / #3 to where they actually are. Drag the slots in iCUE to match the physical position. This makes directional effects (like Color Wave going front-to-back) actually work.
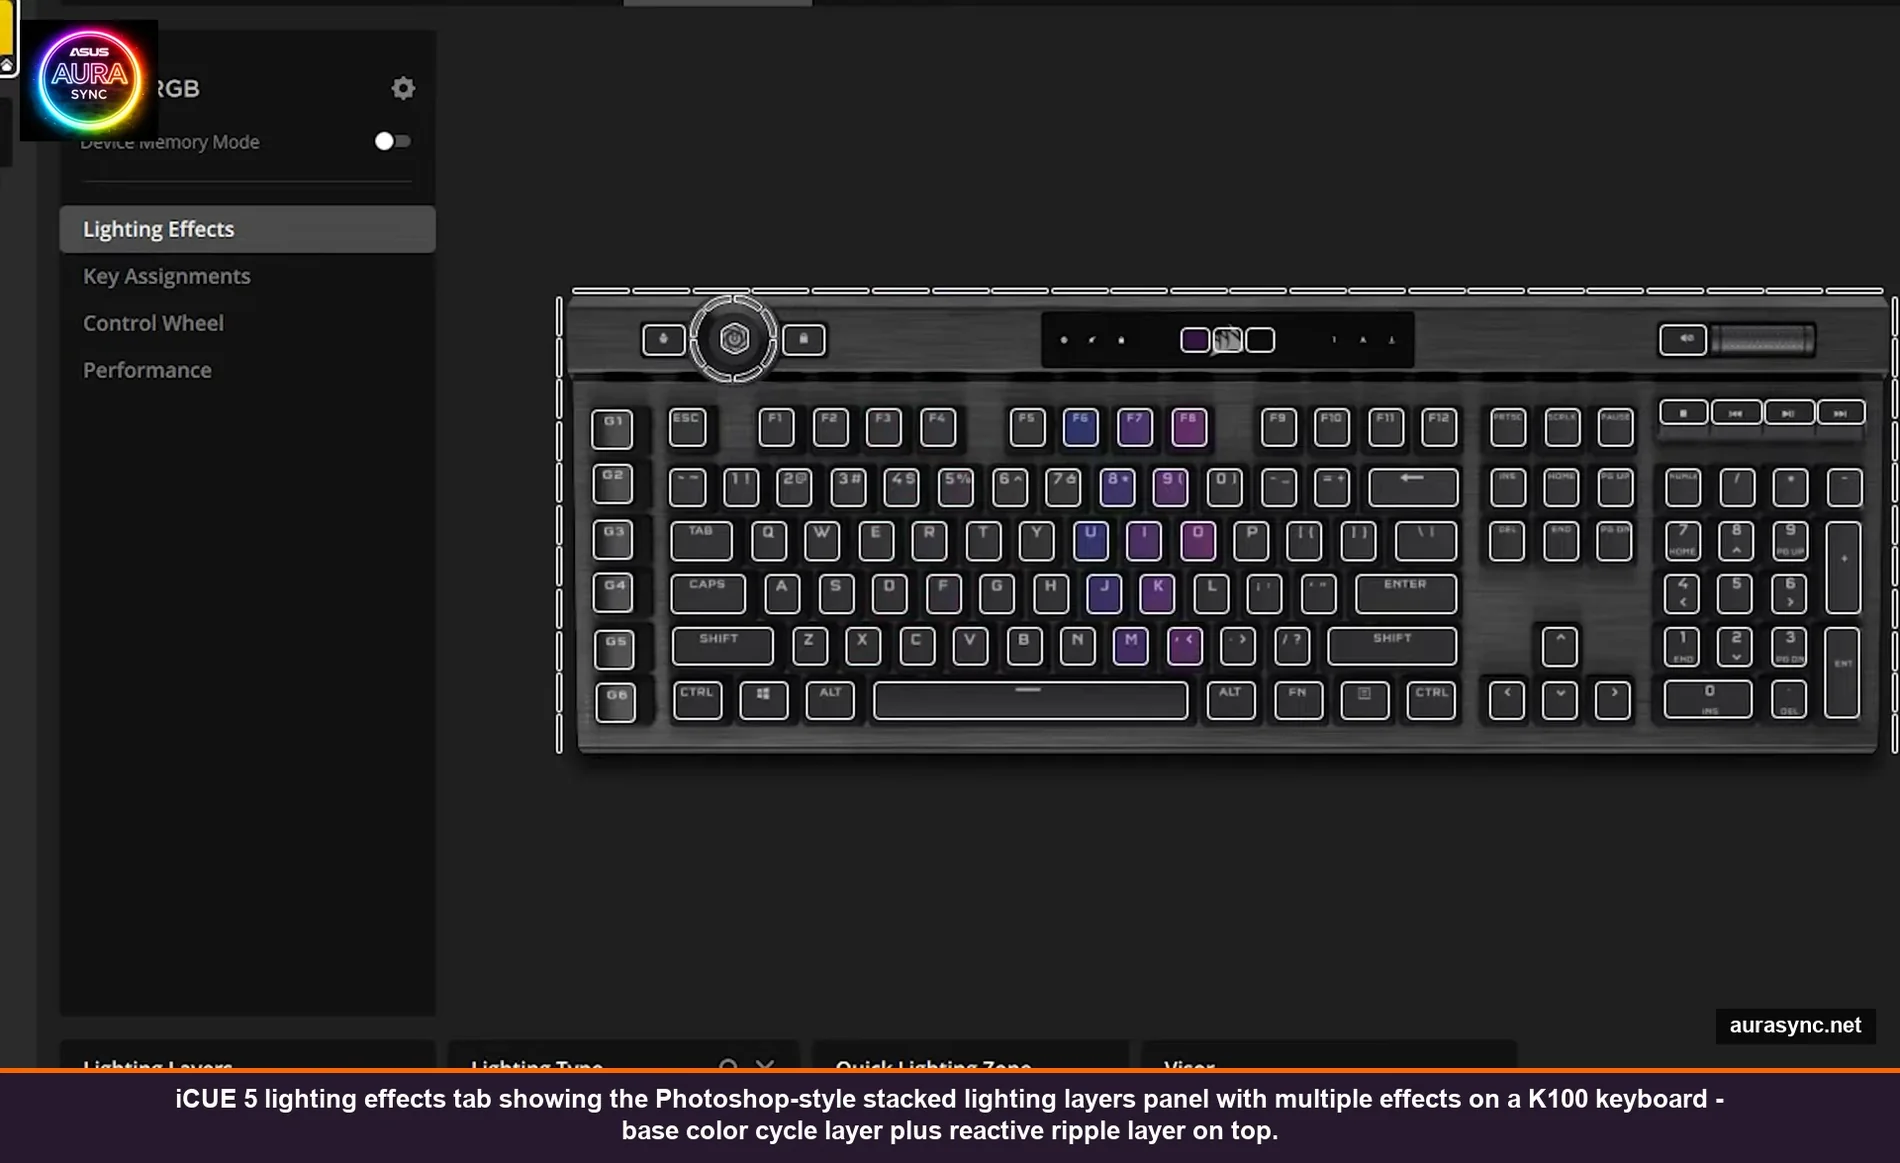
Step 5: Lighting layers (the actually-good part of iCUE)
iCUE’s lighting system is honestly the best of any vendor RGB app. It works like Photoshop layers: you stack effects, top one wins on overlapping LEDs, lower layers show through where the top one is transparent. Once you get the model, you can build effects no other app can match.
The basic workflow: pick a device → Lighting Effects tab → click the + button under “Lighting Layers” → pick an effect type. Add another layer on top. The top layer overrides the bottom for any LED both layers cover.
Two examples that show why this matters:
Example 1: Color Wave + Type Lighting. Bottom layer is Color Wave (rainbow gradient sweeping across the keyboard). Top layer is Type Lighting (each key flashes white when pressed). Result: ambient rainbow base with key-press feedback layered on top. The Type Lighting layer is mostly transparent except when keys fire, so the wave shows through.
Example 2: Visor + Static Color. Bottom layer is Static Color (one solid color across everything). Top layer is Visor (a small colored bar that moves left to right). The visor sweeps across your solid base color, drawing attention without overwhelming the look.
The layer types iCUE 5 supports are massive. Some highlights:
- Color Pulse, Color Shift, Color Wave – smooth animated color transitions
- Rain – colored droplets falling from the top of the device
- Visor – small bar that moves across (great for accent layers)
- Type Lighting / Mouse Lighting / React on Press – input-driven reactive layers
- Temperature – color shifts based on a sensor (CPU temp, GPU temp, etc.)
- Music Spectrum / Music Pulse – audio-reactive (less powerful than SignalRGB’s audio system but it’s there)
- Custom – draw your own per-LED color timeline. Tedious but the most control.
The Lighting Link category (separate from regular layers) is the one-click “make every Corsair device do the same thing” mode. Useful for quick demos, less useful for final setups because you usually want some devices doing different things.
Step 6: Hardware vs software lighting (Device Memory Mode)
This is the iCUE 5 distinction that confuses everyone and once you understand it, you’ll never be confused again.
Software lighting (default): iCUE is running, computing the lighting in real time, and sending color commands over USB constantly. Unlimited layers, complex effects, audio-reactive stuff, sensor-driven stuff – all of this requires software lighting. The downside: when iCUE is closed, when you reboot, when you boot into a game with iCUE disabled, the lighting goes blank.
Hardware lighting (Device Memory Mode): simpler effects baked into the device’s onboard memory. Once stored, the device runs the effect locally. Lighting persists when iCUE isn’t running, when you boot into a different OS, when the PC is in BIOS, etc. Way more limited (no layers, no input reactions, no audio sync) but it always works.
The toggle is at the top of every device’s Lighting Effects panel: Device Memory Mode. When you flip it on, iCUE switches to a separate “hardware effects” panel where you pick from a much shorter list of effects.
The right answer for most people: leave software lighting on for the experience iCUE is good at, then also configure a hardware-mode fallback for each device so the build looks intentional even before Windows boots. I have my K100 set to a static white in hardware mode and a layered animated effect in software mode. When the PC POSTs into Windows, the keyboard glows static white. Once iCUE loads, the layered effect kicks in. Smooth transition, never goes dark.
Step 7: Fan curves in iCUE (this is where it shines vs other apps)
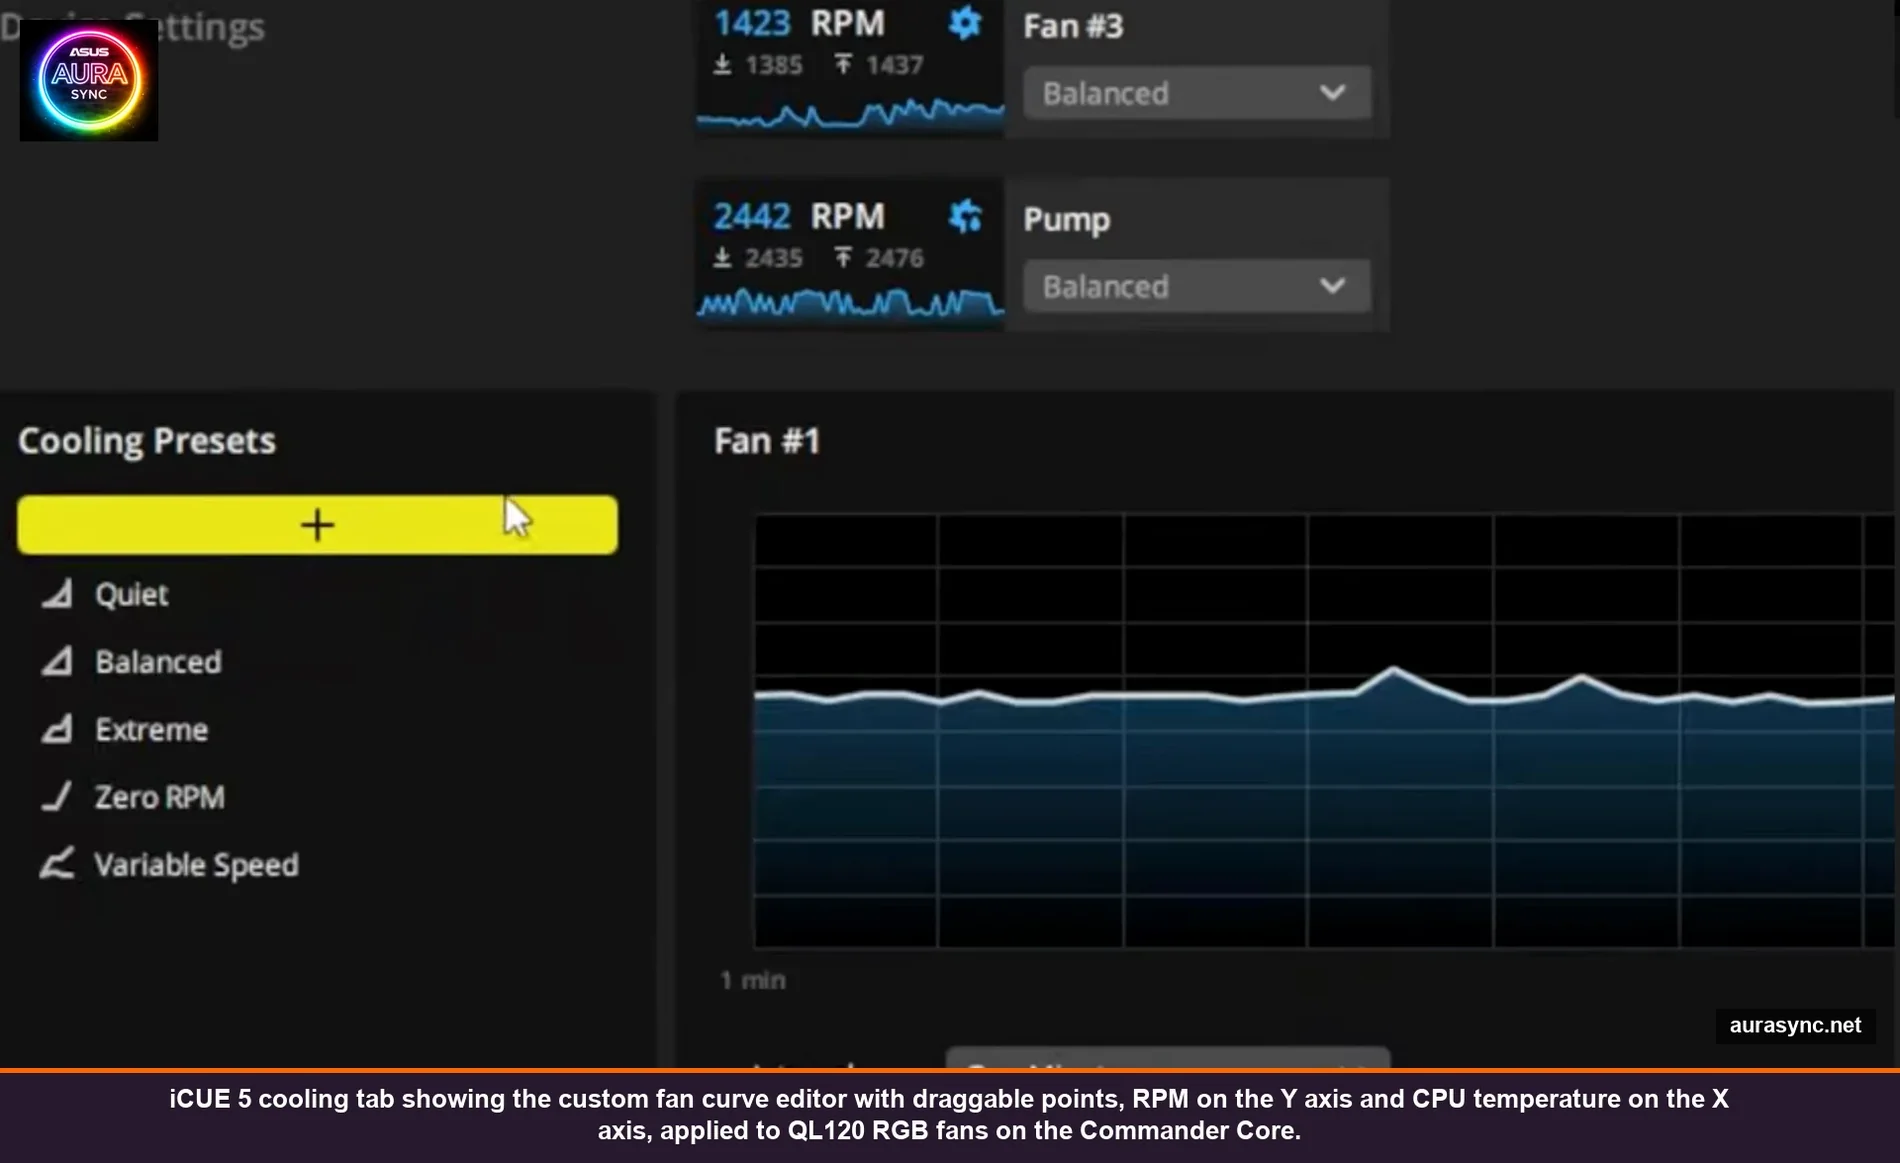
iCUE’s fan control is genuinely excellent and the reason a lot of people stick with iCUE even when their RGB has migrated to SignalRGB or OpenRGB. The Cooling tab on any controller (Lighting Node Pro doesn’t have this; Commander Core and iCUE Link do) gives you per-fan curves with custom plot points, sensor source selection, and presets.
The presets ship as Quiet, Balanced, Extreme, Zero RPM, and Variable Speed. The defaults are fine for most builds. Where it gets interesting: you can create custom presets and bind them to a specific sensor that isn’t just CPU temp. Example: I have my AIO pump speed bound to the GPU temp instead of CPU temp because I do more GPU-heavy work than CPU-heavy work and that’s where my heat actually comes from. The default would have ramped the pump on CPU temp, which barely moves on my workload.
To create a custom curve: click the + next to Cooling Presets, name it, then drag plot points on the graph. The X-axis is sensor temp, the Y-axis is fan duty cycle (%). You can have as many points as you want. I usually keep it to 4-5 points: idle baseline, normal load, gaming load, panic temp, max.
One non-obvious setting: Spin Up Time and Spin Down Time on each fan. Default is “Normal” which means smooth ramp. “Immediate” makes fans react instantly to temp changes (useful for server-style setups, annoying for desktop because of audible ramping). For desktop, I leave these on Normal or Extended (smoother but slower response).
Step 8: Profiles and how to actually use them
Profiles in iCUE are device-state snapshots. Each profile saves: lighting setups for every device, fan curves, macro assignments, mouse DPI stages, key remaps, the whole thing. You can switch profiles manually or have them auto-trigger when a specific app launches (Linked Apps).
The most useful profile patterns I’ve found:
- Default – the everyday look. Subtle ambient lighting, balanced fan curves.
- Gaming – linked to my game launcher (Steam.exe). Triggers a louder fan curve, brighter keyboard backlighting, and a high DPI stage on the mouse.
- Streaming – linked to OBS.exe. Forces fans to silent profile (no audible ramp on stream), keyboard to a static color (no rainbow flicker on camera).
- Off – everything dark, fans on quiet preset. For when I’m sleeping near the PC.
Switch with the profile dropdown at the top, or set up a hotkey under Profile → Activation. The hotkey is the underrated way to do it because you can switch without opening iCUE.
To export a profile (so you can restore after a Windows reinstall): click the profile → Export → save as name.cueprofile. To import: drag the file into iCUE or use Import from the same menu. I keep my profiles in OneDrive so they survive any rebuild.
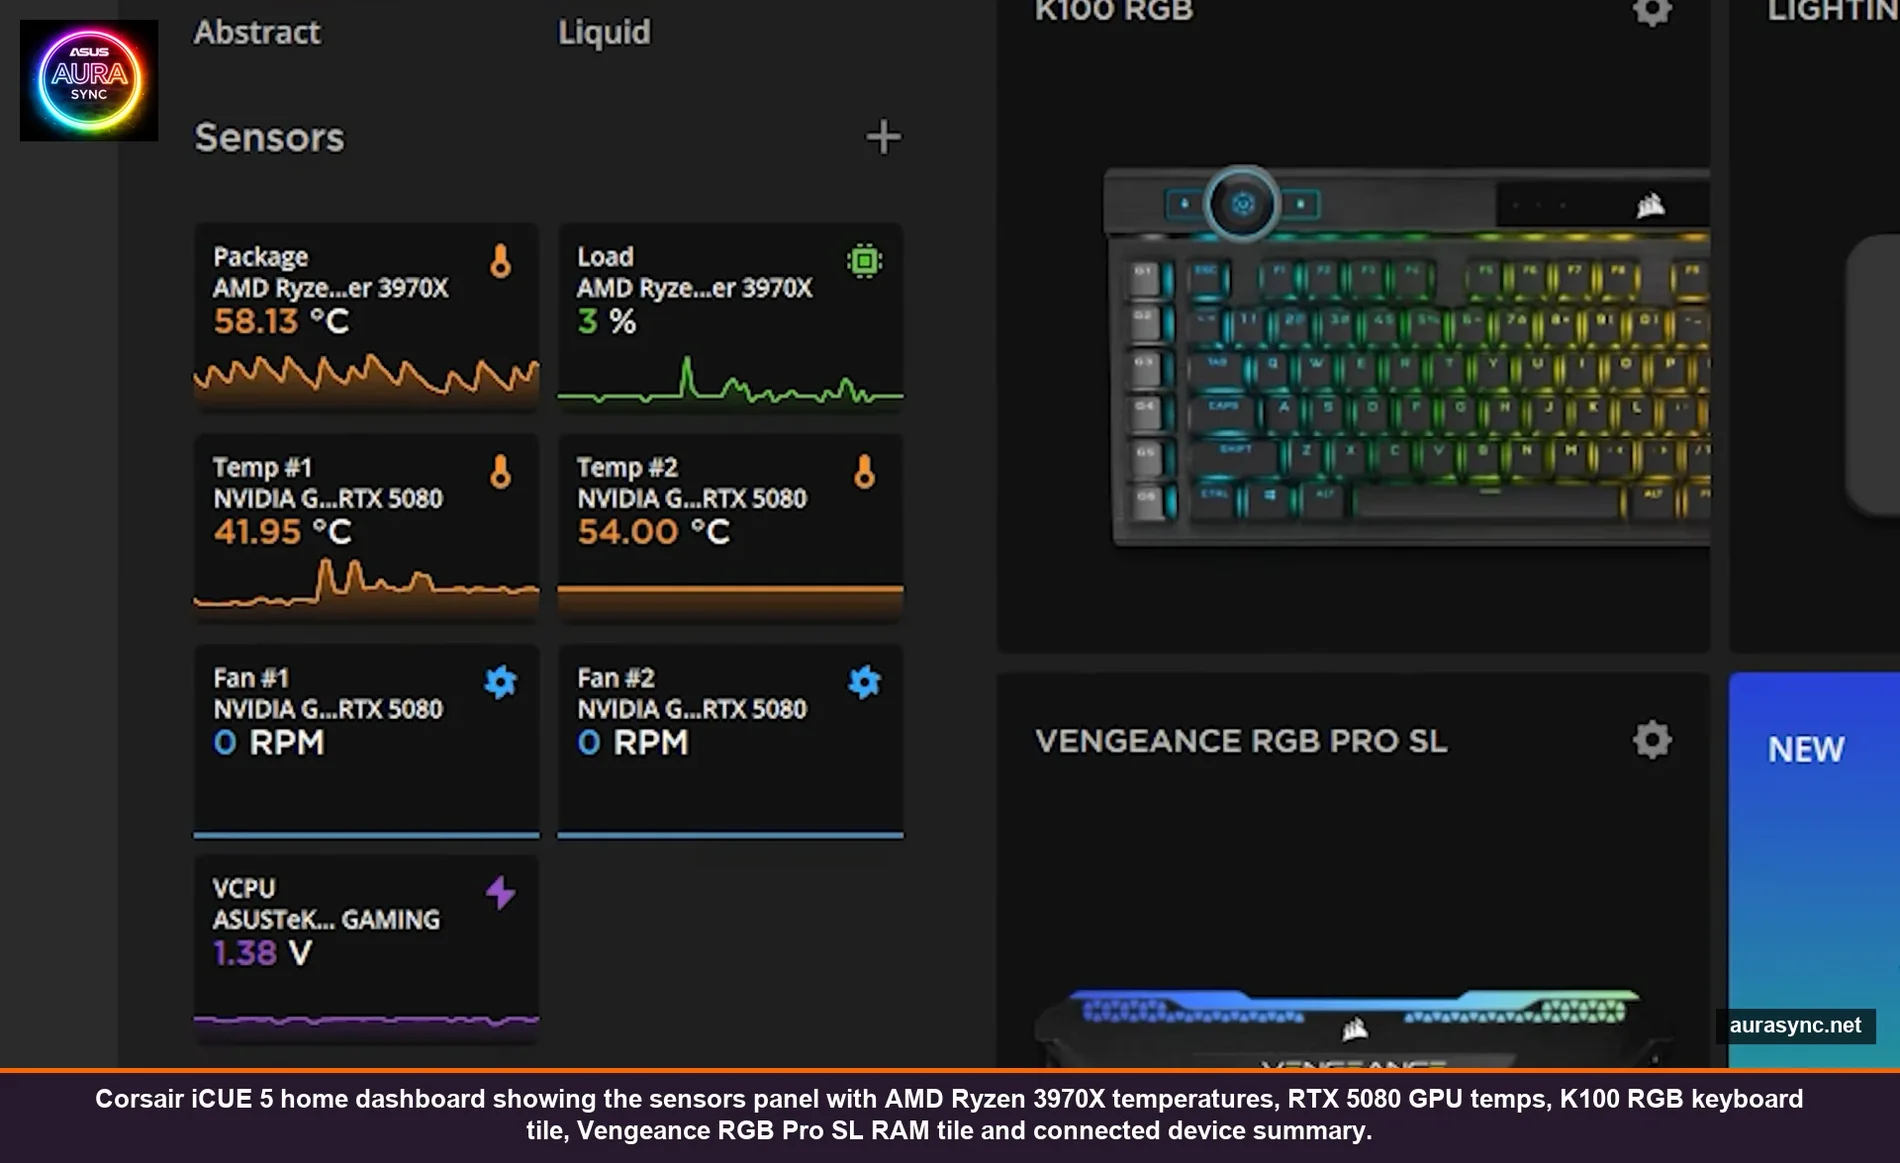
Step 9: The IQ Murals and dashboard sensors
The Murals tab is iCUE 5’s newer feature for unifying lighting across multiple devices into a single coordinated effect. It’s most useful for builds with iCUE Link (where the smart cabling makes spatial layout possible). For older Corsair gear it’s largely cosmetic – it works but doesn’t do much you couldn’t already do with regular lighting layers.
The Dashboard sensor view is more useful. Open Dashboard, drag in CPU temp, GPU temp, RAM usage, voltage, fan RPMs, anything iCUE can read. It’s a lightweight HWiNFO-style monitor without needing a second app. Useful when troubleshooting thermal issues because you can correlate fan curves and temps in real time.
The bloat / what to skip during install
iCUE 5’s installer offers some optional components. My take:
Install:
- Core iCUE app – obviously
- Murals – if you have iCUE Link gear, otherwise skip
- Plugin support – useful for third-party device integrations
Skip:
- Voicemod plugin – it’s a cross-promo, not actually useful unless you specifically use Voicemod
- Marketing content panels – close them, they keep coming back. The “WELCOME PLUGINS” splash card on the home screen can be permanently dismissed via Settings → General → “Show promotional content” off.
Common iCUE problems and the actual fix for each
RAM detected, lighting controls do nothing
BIOS SPD Write Disable is set to TRUE. Reboot, set it to FALSE, problem solved. See Step 3 above.
Fans only one or two are lighting up
Wrong fan model selected on the lighting channel. Open Lighting Setup → click the channel → pick the actual fan model (QL, LL, ML Pro, HD – not “Default Fan”). Mismatched LED counts cause this exact symptom.
Profile doesn’t auto-load on boot
Either iCUE isn’t set to start with Windows (Settings → General → “Launch on Windows startup”) or the profile isn’t set as Default. Set both. Also: if you use Windows fast startup, iCUE sometimes loads before the device USB is fully enumerated. Fix is either to disable Windows fast startup, or in iCUE Settings turn on “Wait for devices on startup.”
Lighting freezes after some time
Usually a USB power issue. If you have lots of devices on a single USB controller, Windows can throttle them. The fix is to plug the lighting controller directly into a rear motherboard USB 2.0 header (not USB 3.0, not a hub) – the Lighting Node Pro and Commander Core specifically prefer USB 2.0 for stability.
Effects work in iCUE but stop when you close it
That’s expected behavior for software lighting. Switch to Device Memory Mode for any device that needs to keep lighting when iCUE is closed. See Step 6.
iCUE crashes on launch
Almost always a corrupted profile. Workaround: launch iCUE in safe mode (hold Shift while opening it from the Start menu), then delete the recent profile and recreate it. If that fails, do a clean install: uninstall iCUE, delete %AppData%\Corsair, reinstall fresh.
iCUE vs the alternatives
iCUE is the right answer for a Corsair-dominant build. The lighting layers system, the fan curves, and the device-memory fallback are genuinely better than the equivalent in any other vendor app. The downside is iCUE only sees Corsair gear. The moment you add an ASUS motherboard or a Razer mouse, iCUE doesn’t see them and you either accept that those devices run on their own apps, or you migrate everything to a cross-brand tool like SignalRGB.
I covered OpenRGB vs SignalRGB and cross-brand sync in separate articles. For a pure Corsair build though, stick with iCUE 5. The 5.x branch is meaningfully better than iCUE 4 and the historical “iCUE is bloated” reputation no longer matches the current state of the app (idle CPU usage on my 7800X3D sits around 0.4% with the dashboard open and lighting active).
FAQ
Does iCUE work on Linux or Mac?
iCUE is Windows-only. Mac has limited support for some Corsair peripherals via the Corsair Headset Mac app and standalone keyboard/mouse drivers, but full iCUE with lighting and fan control is Windows-exclusive. On Linux, OpenRGB has Corsair device support but feature coverage is limited (basic lighting works, fan control mostly doesn’t).
Can I use iCUE alongside Armoury Crate or Razer Synapse?
Yes, they don’t fight directly because each one only sees its own brand’s hardware. The exception is Windows Dynamic Lighting, which can fight with all of them – set iCUE as the priority controller in Windows Dynamic Lighting settings if you want iCUE to win the priority race for any peripheral that overlaps.
Will iCUE eat my CPU or RAM?
iCUE 5 idle is around 100-150MB RAM and well under 1% CPU on modern hardware. The Dashboard panel (if open and showing live sensor graphs) adds maybe 0.5% CPU. The “iCUE eats CPU” reputation comes from the iCUE 3 era around 2019-2020. Current state is fine.
Why do my profiles disappear after a Windows update?
Windows updates sometimes reset USB device permissions which can cause iCUE to not recognize devices on first boot post-update, which means profiles tied to those devices appear “lost.” They’re not – reopen iCUE, let it re-enumerate devices, profiles come back. If they truly are gone, that’s why you exported them to .cueprofile files in Step 8.
Does iCUE work with Aura Sync RAM (G.Skill, etc.)?
No. iCUE only controls Corsair RGB. G.Skill Trident Z, Crucial Ballistix, Kingston Fury, etc., all use different protocols and iCUE can’t see them. For non-Corsair RAM you need either the vendor app (G.Skill Lighting Control, etc.) or a cross-brand tool.
What’s the difference between iCUE Link and the older Corsair gear?
iCUE Link is Corsair’s smart-cable system where every device daisy chains over a single cable that carries power, RGB data, and sensor data. It’s a hardware refresh, not a software change. iCUE 5 supports both old and new gear in the same install. iCUE Link gear is more expensive and harder to mix with other brands but the cabling is cleaner.
Wrapping up
iCUE has a reputation problem that doesn’t match its current quality. Most of the “iCUE is broken” complaints I see on Reddit trace back to:
- Skipped firmware updates
- SPD Write disabled in BIOS (RAM RGB)
- Wrong fan model on a lighting channel
- USB power throttling on a packed hub
All four are covered above. Do those, plus the device memory mode fallback for boot persistence, and iCUE basically just works. The lighting layers system is then yours to enjoy and it really is the best implementation of any vendor RGB app right now.
If you’re still hitting walls, the Corsair subreddit and the official Corsair Discord are both responsive. Bring screenshots of your Lighting Setup tab and the device list – that’s the info that lets people actually help.